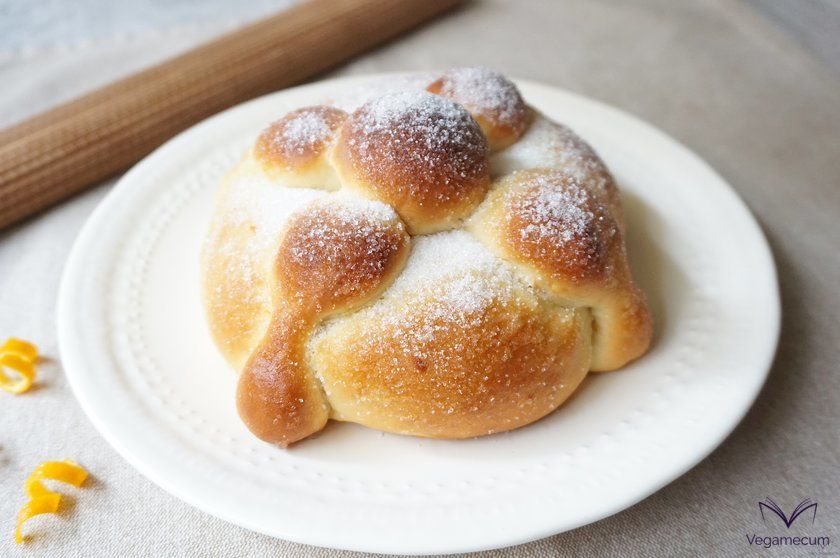
The bread of the dead is a sweet typical of Mexico that consumes the 'Day of the Dead' to honor the memory of loved ones who are no longer. This day was declared by UNESCO "Masterpiece of the Oral and Intangible Heritage of Humanity" on November 7, 2003.
Although the origin of this dessert dates from the 16th century, according to INAH (National Institute of Anthropology and History) its consumption seems to be a tradition inspired by pre-Hispanic rituals, symbolizing today the circle that unites life and death , hence its round shape.
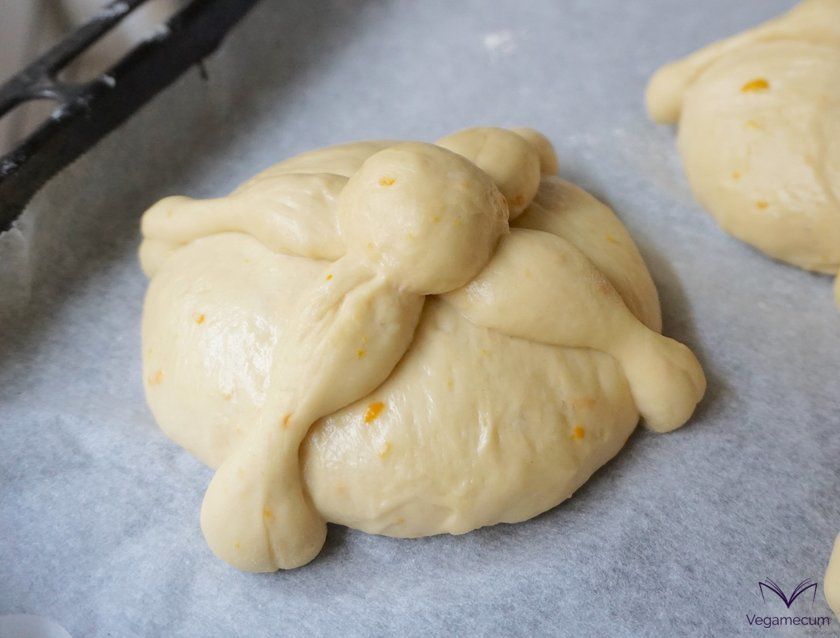
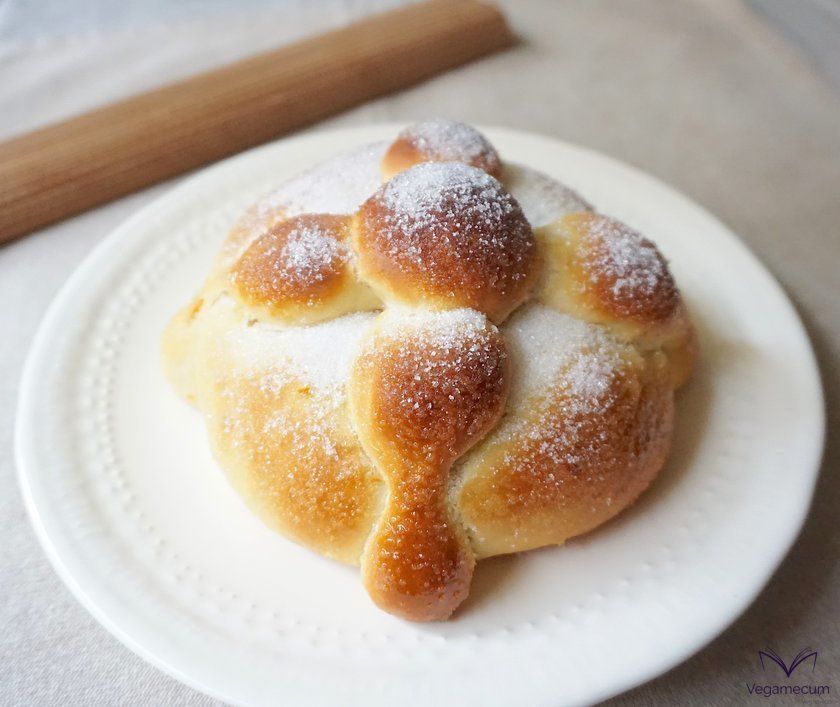
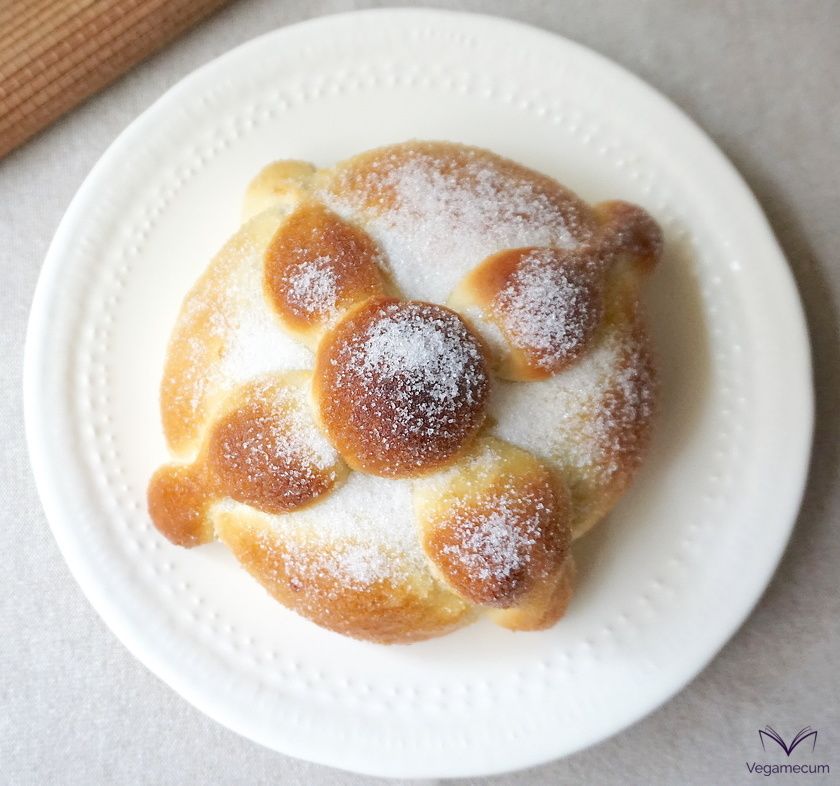
This sweet bread is loaded with symbolism, because in addition to its shape, the rest of the elements that make it up also have its reason for being. Thus, the sphere that is in the center, represents a skull, while the quills represent the bones, crossed in such a way that they make reference to the 4 cardinal points dedicated to the gods Tezcatlipoca, lord of heaven and earth; Tlaloc, supreme god of the rains; Quetzalcoatl , lord of the morning star; and Xipetotec, god of spring. If we look at the ends of the quills, we see that these look like tears, which symbolize the tears shed by the absence of those who have already passed away.
And, in this sweet, even the color and flavor are deliberate, because yellow is the color that in pre-Columbian times was associated with death and orange blossom is used in honor of those who are no longer, because its flavor lasts as the memory of those who marched.
This delicacy is characterized by a tender, soft and fluffy texture, and a flavor where the sweet notes of orange join the fragrant aroma of orange blossom, properties that make it a delicious offering to welcome the most beloved souls on days 1 and November 2.
In addition, by not carrying eggs or dairy products, this dead bread is healthier and lighter than the conventional one, as it does not contain cholesterol, lactose, casein or trans fats.
Below you can see what ingredients you need and the steps to follow to make this sweet so simple and at the same time so exquisite and emblematic.
| Difficulty level | Preparation time | Rations |
| Medium | 2 h. | For 3 units |
* Plus 2 and a half hours of rest
Ingredients
- 530 gr. wheat flour
- 20 gr. fresh yeast
- 100 gr. non-hydrogenated margarine (at room temperature)
- 190 ml. soy milk
- 120 gr. whole cane sugar
- skin zest of 2 oranges
- 3 tablespoons orange blossom water
- 3 tablespoons corn starch
- 6 tablespoons water (warm)
- 1 teaspoon salt
- non-hydrogenated margarine (to decorate)
- sugar (to decorate)
Instructions
- In a bowl, we throw 49 ml. soy milk lukewarm, add the yeast and stir for it to fall apart. We add 16 gr. wheat flour and 30 gr. whole cane sugar and remove it again. Cover the bowl with a clean cloth and reserve in a warm place so that it lightly.
- We wash the oranges well, grate the skin and reserve too.
- In another bowl, we throw out the corn starch and water and stir for the starch to dissolve. We reserve
- On a flat and clean surface, put the remaining flour, make a hole in the middle and, around the flour, on the outer edge, we throw the sugar. Finally, around the sugar, we toss the salt.
- In the hole we have made in the center of the flour, we toss the starch mixture with water and mix it with the flour little by little. Next, we add the margarine and continue kneading also incorporating the sugar and salt, from the outside to the center.
- Once we have the ingredients well integrated, add the orange zest and the orange blossom water and mix again.
- We add the soy milk little by little and knead for 15 minutes, making stops of 2 minutes for every 5 minutes of kneading so that the dough is taking consistency.
- After this time and when we see that the dough is not hooked in the hands or the work surface, we make a hole in the center, we throw the mixture of soy milk, yeast, flour and sugar that we had reserved and knead again during 30 more minutes, this time without stopping, until we see again that the dough does not get caught in the hands or on the work surface.
- Once the dough is ready, we form a ball with it, pass it to a large bowl with the walls greased with a little oil to prevent it from sticking, cover it with a clean cloth and put it in the oven for 1 hour and average, until it doubles its volume.
- After this time, remove the dough and put it back on a smooth, slightly floured surface, gently pressing it gently to remove the air and giving it a rectangular shape. We set aside 200 gr. of the mass to make the quills and the skulls and, the rest of the mass, we divide it into three equal parts.
- We put some flour in the area where we are going to work. We take one of the 3 pieces of dough, we give it a round shape by stretching the dough gently down and turning it on itself so that the surface is smooth. When we see that the surface is smooth, place the bread on a baking tray covered with parchment paper and flatten it a bit with your hand. Repeat the same steps to form the other 2 loaves and pass them to the tray leaving enough space between them so that when they grow they do not stick.
- To the piece of dough that we had reserved for the decoration, we added a little flour and knead it again to get a drier texture. We give it a rectangular shape and with a knife we divide it into 9 smaller pieces: 3 to make the skulls and 6 to make the quills.
- To make the skulls, we do the same thing that we have done with the loaves: give them round shape working downwards so that the surface is smooth.
- To make the taps, we form with each of the dough pieces a cylinder rolling the dough on itself and, placing the index finger in the center of the cylinder, we roll this again back and forth, until dividing the dough , getting a well marked indentation in the center. Then we do the same by placing the two indexes on the sides of the slit we just made (in the center of each of the 2 ends that we just formed) and we roll back and forth again, until we have the bone finished. We do the same with the other pieces of dough until the 6 bones are ready.
- We varnish with a little water where the bones will go and place these crossed over each of the loaves, making sure they are well glued. We also varnish where the skull will go and we also place it with care. Once assembled, we transfer the loaves to the oven tray and let them rest for another hour in the oven to double their volume.
- After this time, we remove the tray from the oven and put it to preheat to 175º. When the oven has reached this temperature, we introduce the tray in the second oven guide and bake the loaves for 20 minutes. If after 10 minutes, we see that the loaves begin to brown too much, we cover them with baking paper and let them bake until the end, watching that they do not burn.
- Once baked and still hot, we pass them to a rack, varnish the loaves one by one with a little melted margarine and sprinkle a little sugar on top. We shake to get rid of the excess sugar and serve.
Notes
- When selecting the vegetable margarine, see that it is not hydrogenated and that it does not contain palm oil or any ingredient of animal origin (eg, the olive margarine of the Flora brand has gelatin among its ingredients).
- When selecting the vegetable margarine, see that it is not hydrogenated and that it does not contain palm oil or any ingredient of animal origin (eg, the olive margarine of the Flora brand has gelatin among its ingredients).
- It is important that you go dusting the sugar at the same time that you are varnishing the bread with the melted margarine so that the sugar adheres well.
- When it is consumed, the bread of the dead is usually accompanied with coffee or hot chocolate.
If you have any questions, you can leave it to us in the comments. And if you dare and want to show your creations to the world, do not hesitate to label us, we will love to see them through the networks!
Do you join us on social networks? You will find us on Facebook, Twitter, Instagram and Pinterest!

